Simulations of Ocular Dominance and Lateral Connectivity
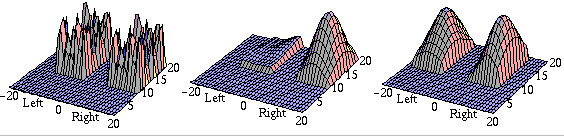
Figure 1. Self-organization of the afferent input weights into
receptive fields.
The first two plots show the afferent weights of a neuron at position
(42,39) in a 60 x 60 LISSOM network before
and after self-organization. This particular neuron becomes
monocular with strong connections to the right eye, and weak connections
to the left. A neuron at position (38,23) becomes binocular with
approximately equal weights to both eyes (third plot).
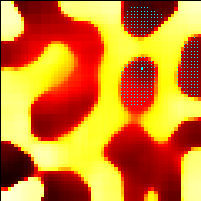
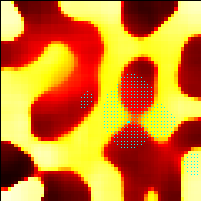
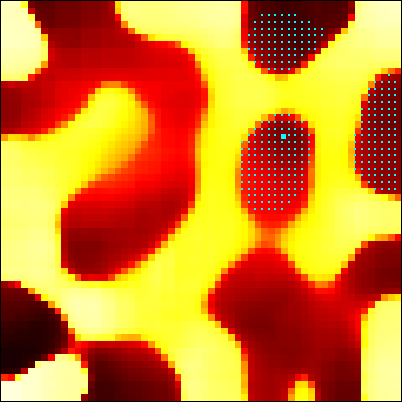
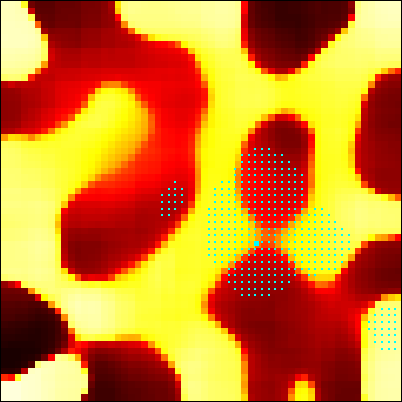
Figure 2. Self-organized ocular dominance and lateral connection patterns.
The ocular dominance of a neuron is measured as the difference in total
afferent synaptic weight from each eye to the neuron. Each neuron is
labeled with a color value from black to orange to white that represents
continuously changing eye preference from exclusive left through
binocular to exclusive right. Small blue dots indicate the lateral
input connections to the neuron marked with a big blue dot. (a)
The surviving lateral connections of a left monocular neuron
predominantly link areas of the same ocular dominance. (b) The
lateral connections of a binocular neuron come from both eye regions.
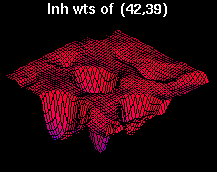
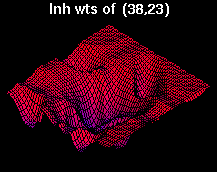
Figure 3. Long range inhibitory connection weights immediately before connection death.
The inhibitory connection strengths of the monocular and binocular neurons
marked in the previous figure are plotted from a viewpoint above the top
right corner of the network. The three predominant patches
in the first plot correspond to the surviving connections of the monocular
neuron shown in figure 2. The strong connections of the binocular neuron
shown in the second plot are more or less concentrated in a valley in its
neighborhood, without strong patchy connections at a distance.
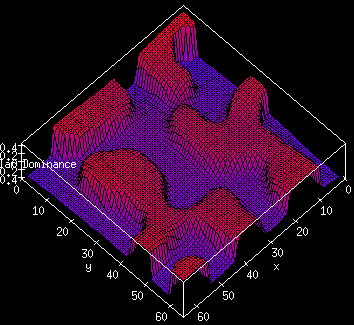
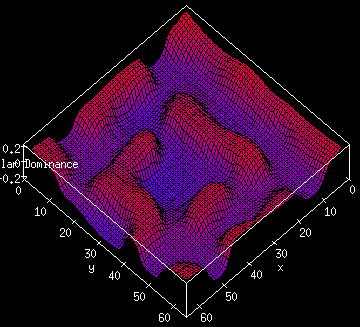
Figure 4. How OD stripe wavelength changes with input correlations.
The figures above shows the ocular dominance of neurons in a 64x64 network
when there are no between-eye correlations (correlation factor of 0.0 on
a scale of 0-1), and when the correlation factor is 0.5. The wavelength
of ocular dominance is much smaller in the latter case, and there are
more OD columns in the same network. When the inputs are perfectly correlated,
(correlation factor of 1.0), no ocular dominance columns develop.
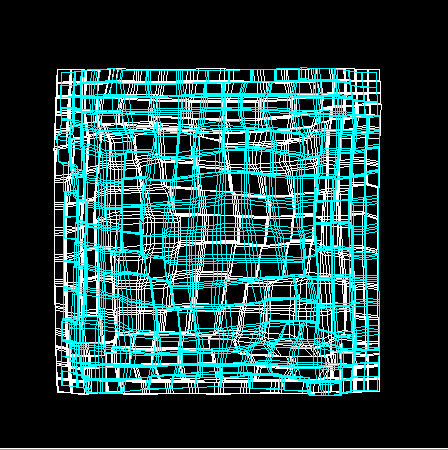
Figure 5. Topographic maps for the two eyes plotted together.
The blue and the white lines represent the retinal topography for each
eye after ocular dominance columns have formed. Each map is drawn by
plotting the center of gravity (COG) of the afferent weights of each neuron
from one eye, and joining up the COGs of neighboring neurons with a line.
It can be seen that the regions of rapid change in topography for one eye
(lines spaced well apart) correspond to regions of slow change for the
other eye (lines bunched together). When plotted separately, it can also
be seen that at the borders of ocular dominance columns, the topography
is distorted.
Back to title page
sirosh@hnc.com