Download the file ChatSkeleton.vi from the
website www.cs.utexas.edu/users/scottm/firstbytes/
Start LabView. Instead of creating a new VI choose the open
option and open the ChatSkeleton program.
This program is a little more complex than any you have
worked with yet. You only need to make some additions and changes to the
program to get it to work.
First, notice there is no send button. Add an OK Button
to the front panel. After placing the button on the front panel and changing
its name to Send go to the block diagram and drag the button to
inside the top while loop, the one that has the caption "Read message and send it to all other active
chat programs"
Next put the parts of a message together. The parts of the
message are the output of the Enter Text function and the output of
the Your Name function. To make the message look like regular chat
messages use a string concatenate function with the name first, then a colon
":" via a String Constant, and finally the contents of the Enter
Text function.

The output of the String Concatenation must be wired
to the input on the Data Socket Write function. This function writes
data to a connection between your program and other programs, which is the
essence of chat type programs: sending data from one computer to another.
The data socket functions in LabView deal with all the low level details of
networking between different programs and different computers.

The last step in building the program is to react to data
being received from another program. The lower while loop is used to receive
and display data from other chat programs. This loop has the explanation
"Receive messages from this, and other chat programs. Display them in the window."
above it. This loop is checking ever 0.3 seconds for new data. If no data is
received the Data Socket Read function times out. There is an
output from this function that is true if it timed out which means no data
was received or false if it did not time out, meaning new data was received.
This new data should be displayed in our Chat Window.
Select the false option on the case structure. Drag the chat window icon
into the middle of the false option on the Case Structure. Add
a Concatenate Strings function and expand it so it can take in three
inputs. Connect the output of the Data Socket Read to the bottom
input of the Concatenate Strings function. Create a Carriage
Return Constant and connect this to the middle input of the Concatenate
Strings function. The partial result should look like this:

We will use a slightly different method to continue to
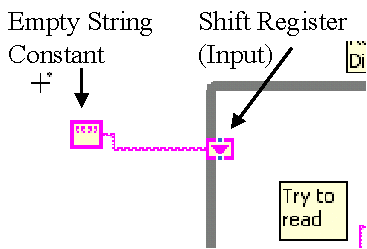
display the old contents of the Chat Window. Create an Empty
String Constant and place it outside the bottom while loop.
Right click on the left side of the while loop. Choose the Add
Shift Register option. This create a flow of data between one iteration
of the while loop and the next. Wire the Empty String Constant to the
input shift register on the left. (The triangle that is pointing down.)
Wire the shift register to the top input on the String
Concatenation function. Wire the output of the String Concatenation
function to the input of the Chat Window and to the output shift
register, the up triangle pointing up on the right side of the while loop.
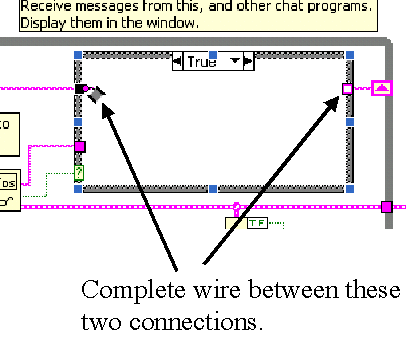
Now select the true option on the bottom case statement.
Wire the two connections on the true option together.
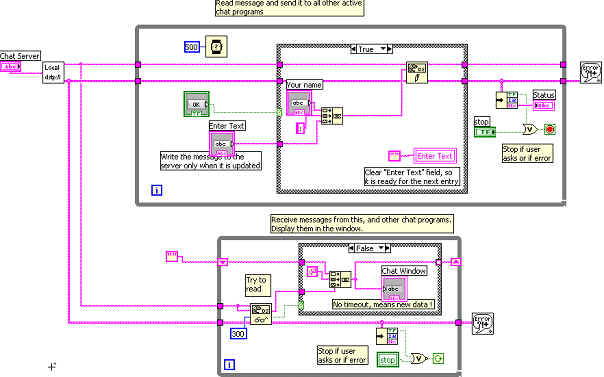
The program should be finished. The final product should look something like
this:
The last steps are to set up LabView so it has the ability
to communicate. Before the chat program can work one student in
the lab needs to perform the following steps to configure a DataSocket server on their
computer to act as a server. (A server is just a computer that provides
services to other computers.) On
that computer launch Programs>>Programming>>National Instruments>>DataSocket>>DataSocket
Server Manager. The following window should appear.

Create a new default data item called
UTFirstBytes by clicking on the New Item button and make sure that
the configuration matches the screenshot above. VERY IMPORTANT. Make sure
the box entitled "Allow Multiple Writers" is checked.
You also need to configure the security of the
DefaultReaders and DefaultWriters to allow everyone to access the server.
Select the DefaultReaders option and ensure the everyhost
option is selected.
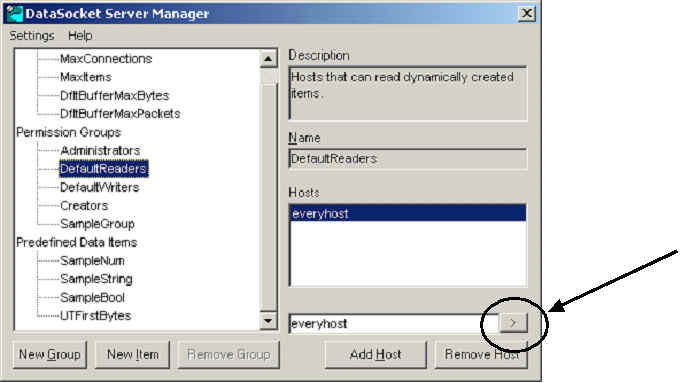
Select
the DefaultWriters option and ensure everyhost is selected.
Make sure to save the changes to the server
(Ctrl-S or use the Settings>>save settings now)
Your
program should now be ready to run. You can chat with yourself by saving the
program with a different name and then running both versions of the program.
You can also chat with someone on another computer. To access a server on another computer, you can
change localhost to its machine name or the IP address.
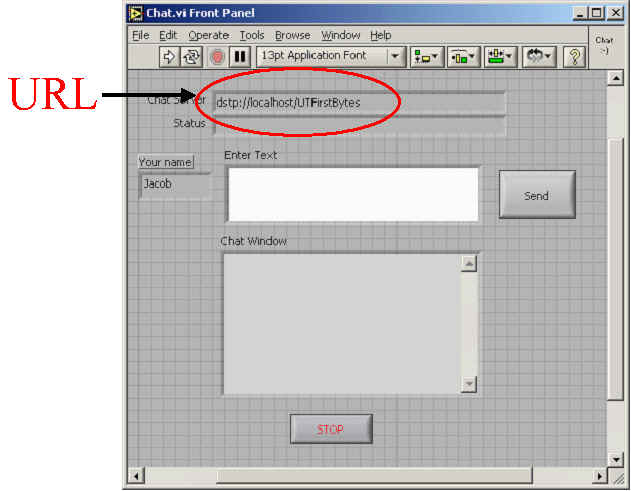
A Chat Server is a DataSocket Data
item, identified at the top of the front panel by a URL (dstp://localhost/UTFirstBytes).
Here dstp is the DataSocket protocol, localhost is the machine name of the
server (in this case it is the same computer that is running the chat
program) and UTFirstBytes is the name of the data item on the server.
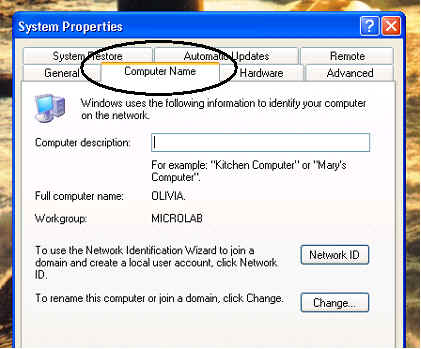
Change local host to the computer name of someone else in the
lab that is running the chat program. You can find names by right clicking
on the myComputer icon on the desktop and selecting Properties. On
the computer properties window select the Computer Name tab. The name
of the computers in the lab will be something like O7.
What next.
-
Try setting up a way to block messages from certain users.
-
Try to send coded messages. A very simple code is a Caesar shift cipher. Pick a number and shift every character that amount. To decode your messages the receiver will have to know what value of a shift you used. (See the instructions below for more details on encrypting messages.)